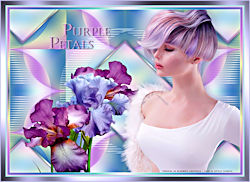
PURPLE PETALS
Tutorial de ©Elizabeth Creations - criado em 25/02/2023.
Este tutorial foi traduzido usando o Paint Shop Pro 2022 Ultimate.
Material Necessário:
PLUGINS:
Simple / Top Bottom Wrap and Left Right Wrap...
VM Toolbox / Instant Tile...
Visual Manipulation / Transmission...
Bkg Designers 1V / Slice and Dice...
Transparency / Eliminate White....
(Importado para o Filters Unlimited)
Mehdi / Wavy Lab 1.1...Graphics Plus / Cross Shadow...
Lembre-se de salvar o seu trabalho com frequência.Copie a seleção e o gradiente para as respectivas pastas do PSP.
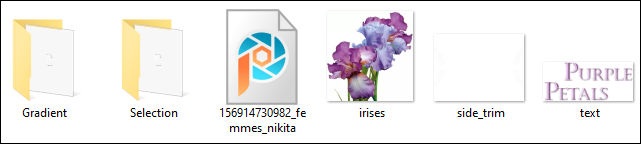
1. Coloque no Primeiro Plano o Gradiente <<Holographic >> estilo RADIAL e configure como segue:
Segundo Plano cor #F8F1F4.
2. Abra uma Nova imagem transparente de 980 X 730 pixels.
3. Preencha com o Gradiente do Primeiro Plano.Adjust / Blur / Gaussian Blur 20.
4. Effects / Plugins / Mehdi / Wavy Lab 1.1:
5. Effects / Plugins / Mehdi / Wavy Lab 1.1: Mesmas cores: #B990C3/#587699/##D2D6BB/#F0F9F7
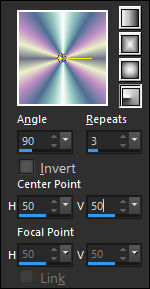
6. Effects / Geometric Effects / Spherize:
7. Repita mais uma vez.
8. Effects / Plugins / Filters Unlimited / Simple / Top Bottom Wrap.
9. Effects / Plugins / Filters Unlimited / Simple / Left Right Wrap.
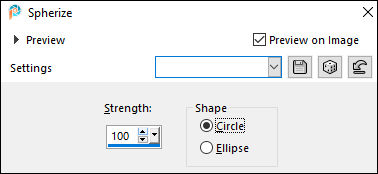
10. Effects / Image Effects / Seamless Tiling:
11. Effects / Plugins / Filters Unlimited / VM Toolbox / Instant Tile ....default.
12. Adjust / Hue and Saturation / Vibrancy 70.
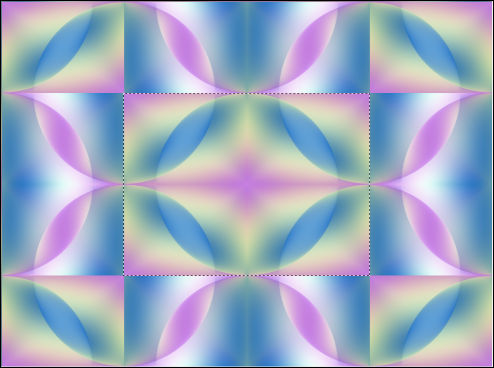
13. Selection Tool / RECTANGLE...Feather: 0... Mode: ADD...Selecione o retângulo central formado.
14. Adjust / Blur / Gaussian Blur / Radius 33.
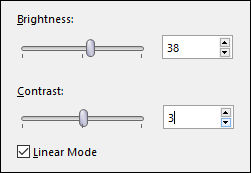
15. Adjust / Brightness and Contrast / Brightness/Contrast:
16. Selections / Promote Selection to Layer.
17. Selections / Modify / Expand / 7 pixels.
18. Layers / New Raster Layer.
19. Preencha com o Gradiente do Primeiro Plano.
20. Selections / Modify / Contract / 8 pixels.
21. Effects / 3D Effects / Cutout: Cor #200935
22. Selections / Select None.
23. Layers / Merge / Merge Down.
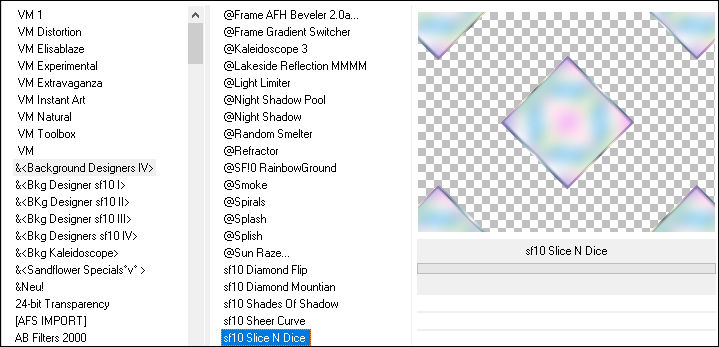
24. Effects / Plugins / Filters Unlimited / &<Background Designers IV> / sf10 Slice N Dice...
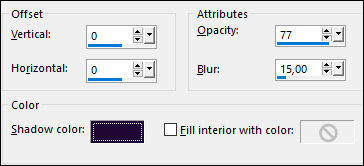
25. Effects / 3D Effects / Drop Shadow: 0/0/70/22/ Cor #00004626. Layers / New Raster Layer.
27. Selections / Load/Save Selection / Load selection from disk: purple_petals28. Preencha a seleção com a cor do Segundo Plano
Selections / Select None.
29. Effects / Plugins / Filters Unlimited 2.0 / Visual Manipulation / Transmission...Default30. Ative a <<Magic Wand Tool>> ( Feather e Tolerance = 0 ) Match Mode: RGB Value....Dê um clique na
área central do circulo
Delete no Teclado
Selections / Select None.
31. Effects / 3D Effects / Drop Shadow: 1 / 1 / 70 / 8 / Cor #00004632. Blend Mode Soft Light.
33. Layers / Arrange / Move Down
34. Ative a Layer do TopoAbra o tube <<156914730982_femmes_nikita>> Copie e Cole como nova layer
Objects / Align / Right
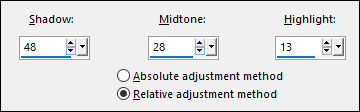
35. Adjust / Brightness and Contrast / Highlight/Midtone/Shadow:
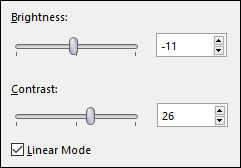
36. Adjust / Brightness and Contrast / Brightness/Contrast:
37. Effects / 3D Effects / Drop Shadow: 1/10/27/50/ Cor #000046
38. Abra o <<irises.png>>
Layers / Promote Background Layer.
Effects / Plugins / Filters Unlimited 2.0 / Transparency / Eliminate White.
39. Copie e Cole como nova layer40. Effects / 3D Effects / Drop Shadow: 0 / 0 / 100 / 0 / #8f4790
41. Layers / Duplicate.
Layers / Merge / Merge Down.
Posicione como segue:
42. Layers / Duplicate...Layers / Merge / Merge Down.
43. Adjust / Brightness and Contrast / Brightness/Contrast: igual ao ponto 36.
44. Layers / Arrange / Move Down.
45. Ative a Segunda Layer a Partir da Layer do Fundo...Abra <<side_trim.png>> Copie e Cole como nova layer
46. Ative a Layer do Topo
Layers / New Raster Layer.
Preencha com o Gradiente do Primeiro Plano
47. Selections / Select All.
Selections / Modify / Contract 10pix.
48. Delete no Teclado
Selections / Select None.
49. Adjust / Hue and Saturation / Vibrancy 70.
50. Effects / Edge Effects / Enhance.
51. Assine seu trabalho.52. Se está feliz com o resultado de seu trabalho...
Image / Add Borders / Symmetric Marcado / 4 Pixels cor #DFB8EE
Image / Add Borders / Symmetric Marcado / 4 Pixels cor #A2E8E1
Image / Add Borders / Symmetric Marcado / 20 Pixels cor #C1BDED
53. Ative a << Magic Wand Tool >> Feather e Tolerance = 0 . Selecione a borda externa.
54. Effects / Plugins / Graphics Plus / Cross Shadow...Default.
55. Selections / Select None.
56. Abra o << text.png >> Copie e Cole como nova layerPosicione como no exemplo.
57. Image / Add Borders / Symmetric Marcado / 2 Pixels cor #C1BDED
Salve seu trabalho como JPG
©Tutorial Traduzido por Estela Fonseca 09/08/2023.
Obrigada Elizabeth por me permitir traduzir seu trabalho.