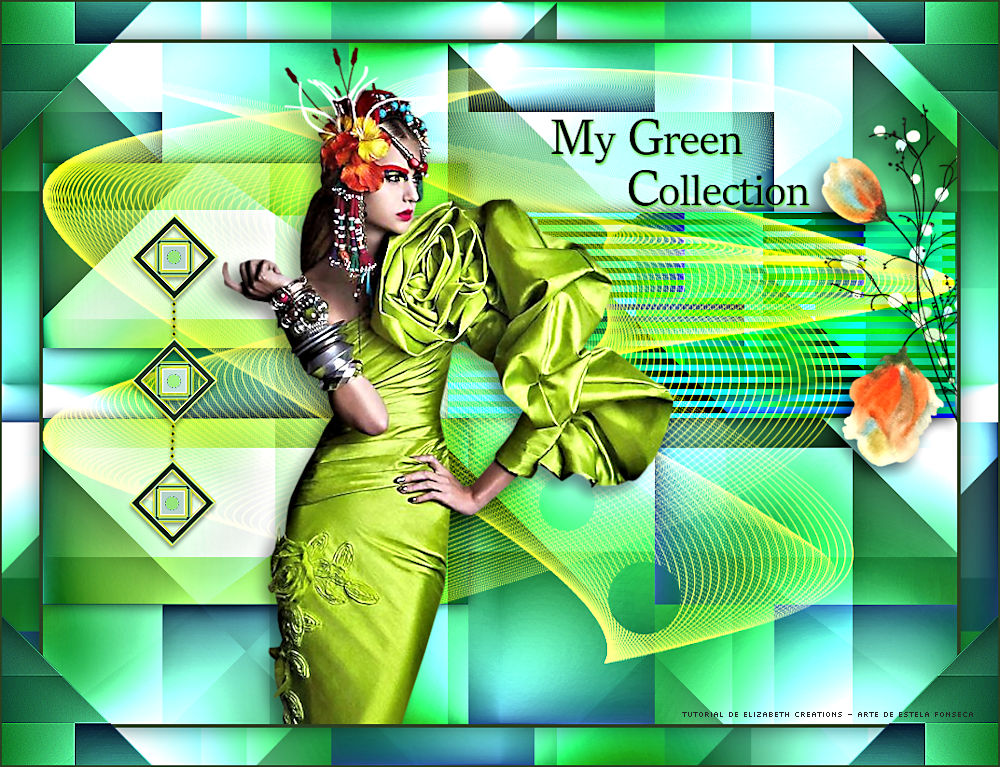
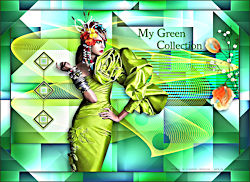
MY GREEN COLLECTION
Tutorial de ©Elizabeth Creations - criado em 03/10/2023.
Este tutorial foi traduzido usando o Paint Shop Pro 2022 Ultimate.
Material Necessário:
Plugins:
Mehdi / Wavy Lab 1.1.
Filters Unlimited 2.0 / VM Extravaganza e Toadies.
Carolaine and Sensibility / CS-Linear-H.
Adjust / Variations.
Lembre-se de salvar seu trabalho com frequência.
Copie as seleções para a pasta de seleções do PSP.
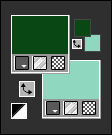
1. Primeiro Plano cor #0c4816 / Plano de Fundo cor #8fd7be.
2. Abra uma nova imagem transparente de 980 X 730 pixels.
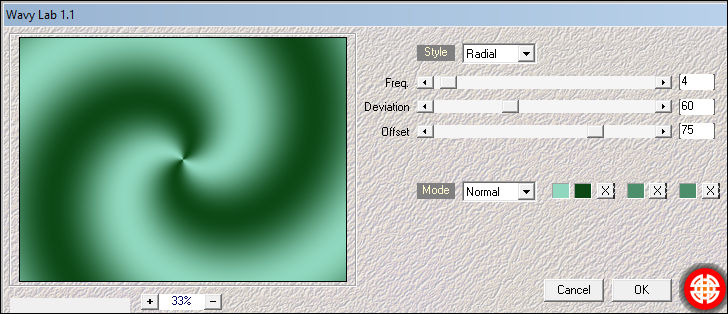
3. Effects / Plugins / Mehdi / Wavy Lab 1.1:
4. Adjust / Blur / Gaussian Blur / Radius 30.
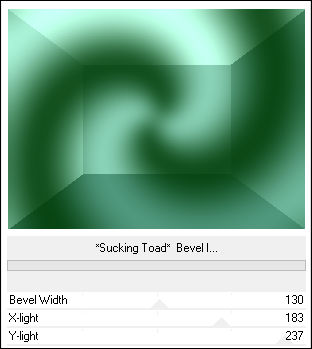
5. Effects / Plugins / Filters Unlimited 2.0/ Toadies / *Sucking Toad* Bevel 1:
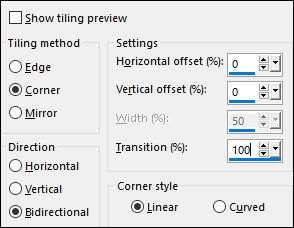
6. Effects / Image Effects / Seamless Tiling:
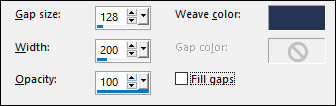
7. Effects / Texture Effects / Weave: #253553
8. Adjust /Brightness and Contrast / Brightness/Contrast: 2 / 26 / Linear Mode:Marcado
9. Adjust /Brightness and Contrast / Fill Light/Clarity: 60/ 68
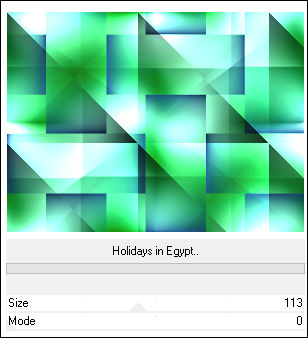
10. Effects / Plugins / Filters Unlimited 2.0/ VM Extravaganza / Holidays in Egypt:
11. Selections / Load/Save Selection / Load Selection From Disk: GC 1 Selection
Selections / Promote Selection to Layer.
Selections / Select None.
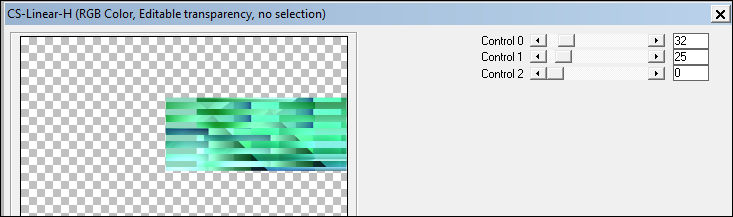
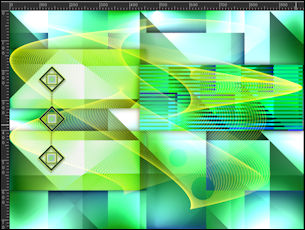
12. Effects / Plugins / Carolaine and Sensibilty / CS - Linear-H:
13. Effects / Plugins / Adjust /Variations...clique em ORIGINAL e três vezes em DARKER.
14. Adjust / Hue and Saturation / Vibrancy 100.
15. Effects / 3D Effects / Drop Shadow: 0 / 0 / 87 / 25 / Cor #00000016. Ative a Layer do Fundo
Selections / Load/Save Selection / Load Selection From Disk: GC 2 selection.
17. Selections / Promote Selection to Layer.
Selections / Select None.
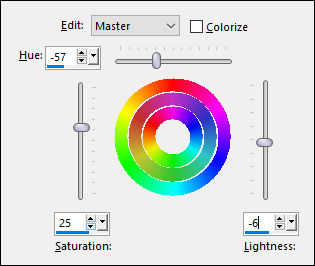
18. Adjust / Hue and Saturation / Hue/Saturation/Lightness:
19. Effects / 3D Effects / Drop Shadow: 0 / 0 / 87 / 25 / Cor #000000.
20. Layers / Duplicate.Image / Mirror / Mirror Vertical.
21. Layers / Merge / Merge Down.
22. Mude a cor do Primeiro Plano #FFFF00.
23. Ative a Layer do TopoLayers / New Raster Layer.
Preencha com a cor do Primeiro Plano
24. Abra a mask GC_mask.png na área de trabalho e minimize.No seu trabalho em andamento
Layers / New Mask Layer / From Image: GC_mask.png.
25. Layers / Merge / Merge Group.26. Blend Mode / SCREEN.
27. Abra o deco.png....Copie e cole como nova layer em seu trabalho.Posicione a esquerda da seguinte forma:
28. Abra o tube SvB (824) Beauty tube... Copie e cole como nova layer em seu trabalho.
29. Image / Resize / 110% ... Resize All Layers ... DesmarcadoPosicione à esquerda
30. Effects / 3D Effects / Drop Shadow: 9 / -8 / 53 / 25 / #000000
31. Abra o tube Riet_424_261018 tube. Copie e cole como nova layer
Posicione à direita da seguinte forma:
32. Repita a sombra do passo 30.
33. Escreva seu nome com uma fonte de sua escolha
34. Se está satisfeito com o posicionamento de seu trabalhoAtive a Layer do Fundo e Copie
35. Layers / Merge / Merge Visible.
36. Adjust /Brightness and Contrast / Fill Light/Clarity:60/6837. Abra o text.png... Copie e Cole como nova layer.
Posicione no topo
38. Image / Add Borders / Symmetric Marcado / 4 pixels cor #2B4022Image / Add Borders / Symmetric Marcado / 40 pixels #FFFFFF
39. Magic Wand Tool (Feather e Tolerance 0) selecione a borda branca
Cole na seleção (a imagem que copiou)
40. Image / Mirror / Mirror Horizontal.
Selections / Invert.
41. Effects / 3D Effects / Drop Shadow: 0 / 0 / 50 / 30 / Cor #00000042. Selections / Select None.
43. Abra 4_corners.png....Copie e cole como nova layer em seu trabalho.
44. Effects / Edge Effects / Enhance.
45. Image / Add Borders / Symmetric Marcado / 2 pixels cor #2B4022.
Salve como Jpg.
©Tutorial Traduzido por Estela Fonseca 27/11/2023.
Obrigada Elizabeth por me permitir traduzir seu trabalho.