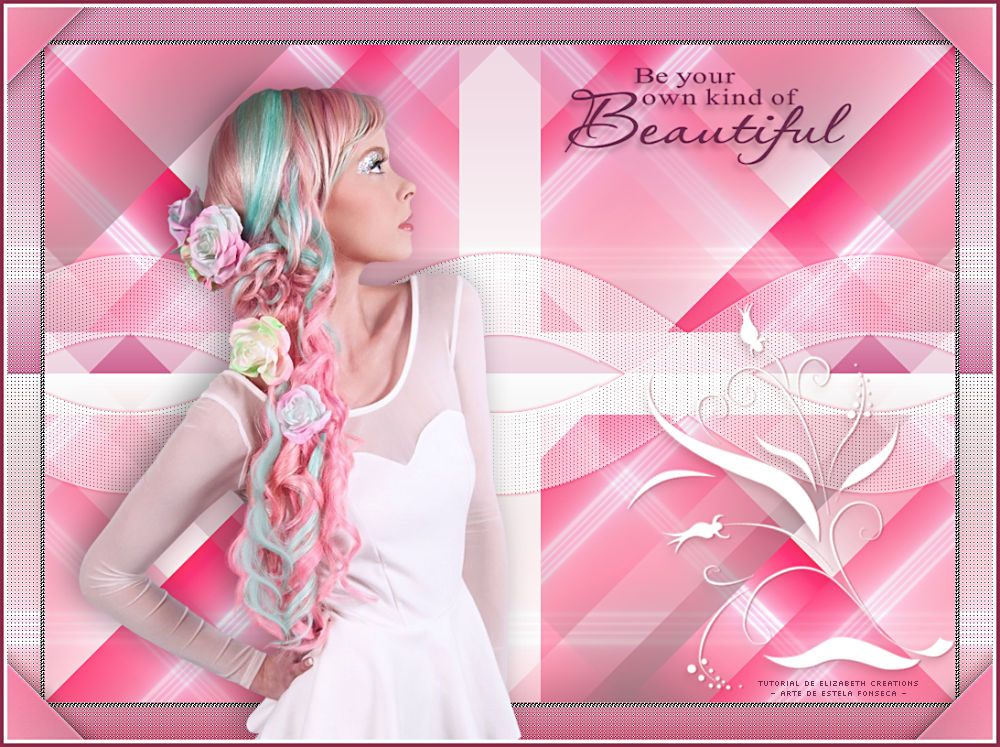
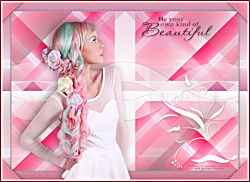
BE BEAUTIFUL
Tutorial de ©Elizabeth Creations
Este tutorial foi traduzido usando o Corel'Paint ShopPro' 2022 ULTIMATE.
Material Necessário:
Agradeço a tubeira Joanie pelo tube da personagem.
Plugins Utilizados:Filters Unlimited 2.0 / Kang 3, Screenworks e VM Toolbox
AP [Lines] / Lines-SilverLining
Lembre-se de salvar seu trabalho com frequência.
1. Na Paleta de Materiais...defina seu Primeiro Plano com a cor branca (#FFFFFF).
2. Abra uma nova imagem transparente de 1085 X 808 pixels.
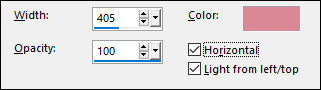
3. Preencha com a cor branca do primeiro plano.4. Effects / Texture Effects / Blinds: Cor #da8895
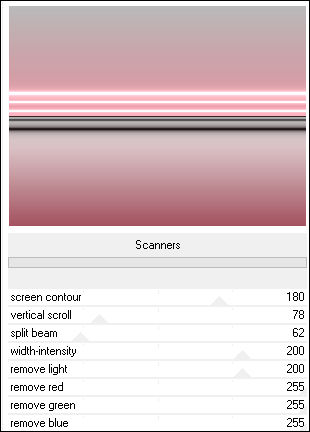
5. Effects / Plugins / Filters Unlimited 2.0 / Kang 3 / Scanners / Default
6. Adjust / Brightness and Contrast / Brightness/Contrast: 25 / 24 - Linear Mode, Marcado.
7. Selections / Select All.
Selections / Modify / Contract 45 pixels.
8. Selections / Invert.
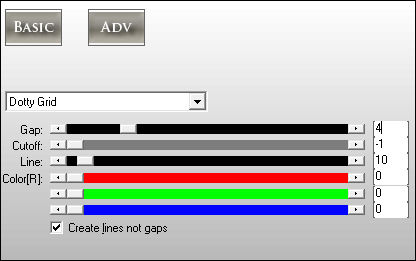
9. Effects / Plugins / AP [Lines] / Lines-SilverLining:
10. Effects / Edge Effects / Enhance.
11. Selections / Invert.
12. Effects / 3D Effects / Drop Shadow: 0 / 0 / 30 / 25 / Cor #00000013. Selections / Promote Selection to Layer.
14. Selections / Load/Save Selection / Save Selection to Disk: nomeie essa seleção de BBR selectione Salve na pasta de seleções do PSP.
15. Selections / Select None.
16. Effects / Geometric Effects / Skew : 45 / Vertical / Wrap
17. Opacidade / 50%.
18. Layers / Duplicate.
19. Image / Mirror / Mirror Horizontal.
20. Layers / Merge / Merge Down.
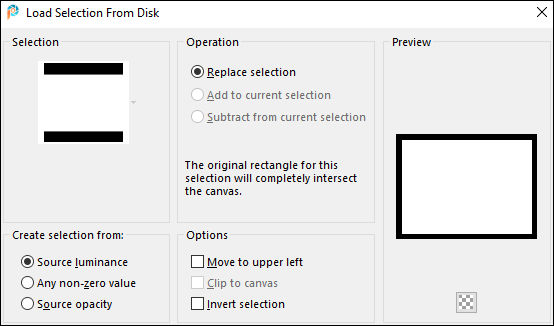
21. Selections / Load/Save Selection / Load Selection From Disk: BBR selection
22. Selections / Invert.
23. Delete no Teclado.
24. Selections / Select None.
25. Effects / Plugins / Filters Unlimited 2.0 / VM Toolbox / Slipthrough.
26. Image / Flip / Flip Vertical.27. Adjust / Hue and Saturation / Vibrancy 100.
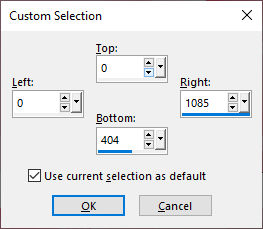
28. Adjust / Brightness and Contrast / Brightness/Contrast: -25/17/ Linear Mode Marcado29. Ative a Layer do Fundo
Selection Tool (S) RECTANGLE...Custom Selection:
30. Adjust / Hue and Saturation / Colorize: Hue 240 e Saturation 133.
31. Selections / Select None.
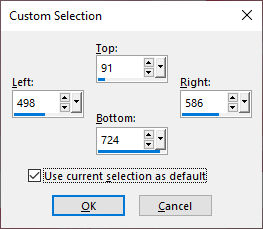
32. Ative a Layer do TopoSelection Tool (S) RECTANGLE...Custom Selection:
33. Selections / Promote Selection to Layer.
34. Effects / Plugins / AP [Lines] / Lines-SilverLining: (mesmas configurações de antes).
35. Adjust / Sharpness / Sharpen.Selections / Select None.
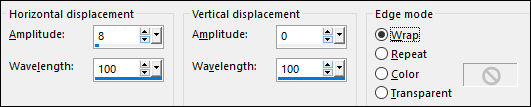
36. Effects / Distortion Effects / Wave:
37. Layers / Duplicate .
Image / Mirror / Mirror Horizontal.
38. Layers / Merge / Merge Down.
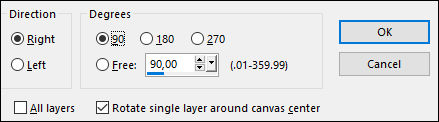
39. Image / Free Rotate:
40. Layers / Duplicate.
Image / Mirror / Mirror / Horizontal.
41. Junte as duas criações... sobrepondo-as até ficarem bem conectadas:
42. Layers / Merge / Merge Down.
Objects / Align / Horizontal Center.
43. Effects / 3D Effects / Drop Shadow: 0 / 0 / 100 / 5,80 / Cor #932D3D44. Blend Mode / HARD LIGHT
Opacidade / 70%.
45. Repita as Etapas 21 a 24.
46. Se você está satisfeito com o posicionamento do seu trabalho... entãoLayers / Merge / Merge Visible.
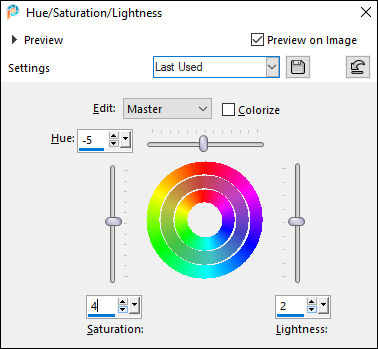
47. Adjust / Hue and Saturation / Hue/Saturation/Lightness:
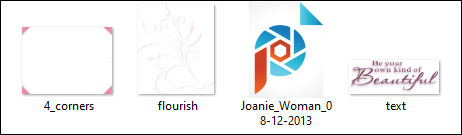
48. Abra o tube <<Joanie_Woman_08-12-2013>> Copie e cole como nova layer
Pick Tool (K) Position X (81,00) Position Y (89,00 ) Tecle na lera "M" do teclado para anular a Pick
49. Effects / 3D Effects / Drop Shadow: - 6 / -10 / 37 / 50,00 / Cor #00000050. Abra o tube << flourish.png.>> Copie e Cole como nova layer
Pick Tool (K) Position X (680,00 ) Position Y ( 326,00 ) Tecle na lera "M" do teclado para anular a Pick
51. Effects / 3D Effects / Drop Shadow: 6 / -3 / 13,00 / Cor #5D272E
52. Abra o <<text.png >> Copie e Cole como nova ayer
Pick Tool (K) Position X (605,00 ) Position Y (67,00 ) Tecle na lera "M" do teclado para anular a Pick
53. Abra o tube << 4_corners.png.>> Copie e cole como nova layer
54. Layers / New Raster Layer
Preencha com a cor branca do Primeiro Plano
55. Selections / Select All.
Selections / Modify / Contract 4 pixels.
Delete no teclado.
Selections / Select None.
56. Ative a layer do FundoSelections / Select All.
57. Selections / Modify / Contract 40 pixelsSelections / Modify / Select Selection Borders: 4 pixels e INSIDE selecionado
58. Preencha a seleção com a cor branca do Primeiro Plano.
59. Effects / Plugins / Filters Unlimited 2.0 / Screenworks / Close Knit.
60. Selections / Select None.
61. Escreva seu nome com uma fonte de sua preferência.62. Se você está satisfeito com o posicionamento do seu trabalho...
Image / Add Borders / Symmetric Marcado / 4 Pixels cor #8b2d49.
Salve como arquivo JPG.
©Tutorial Traduzido por Estela Fonseca 07/02/2024.
Obrigada Elizabeth por me permitir traduzir seu trabalho.