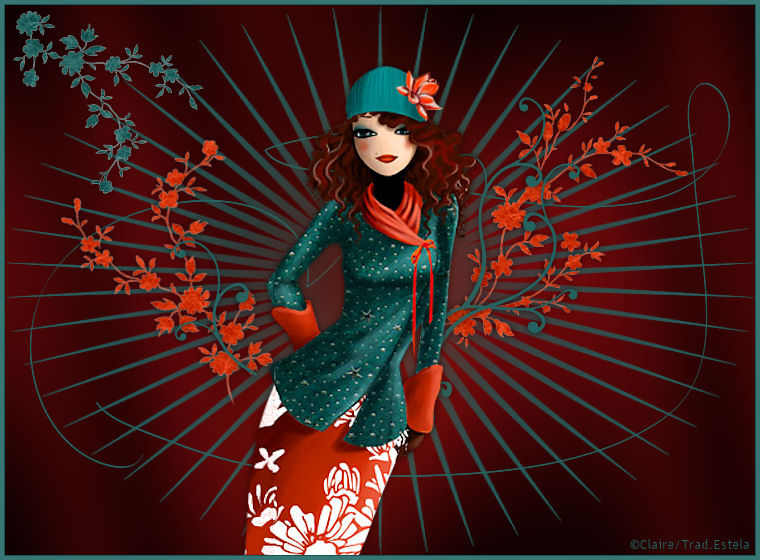
YARIS
Tutorial de ©Créa Barbouille - Original Aqui
Materiais: 1 Mask E 6 Seleções. AQUI
Para este tutorial, usei um tube de Yoka, agradeço a sua permissão!
Plugins utilizados:Unlimited-Texturas Papel
Gráfica Plus Cross-Shadow
1:) Abra uma imagem transparente de 750px/550px.Preencha com a cor "3d0506".
Plugin "Graphic Plus Cross-shadow" default.
2) Foreground cor 246260 e Background cor d1330a.Abra a mask "claire_masque_yaris".
Em seu trabalho,
Layers, new raster layer
Preencha com a cor 246260 (Foreground).
Layers, new mask layer, from image
Localize a mask "claire_masque_yaris".
Delete a layer da mask e merge group.
Layers, duplicate.
3:) Layers, new raster layer,
Preencha com a cor 246260 (Foreground).
Selections, load selection, from disk
Carregue a seleção "claire_yaris_lacet"
Invert Selection, marcado.
Pressione o botão "delete" no teclado.
Selections, select none.
Layers, duplicate.
Iremos fazer a decoração,
dependendo do tube, voltaremos a mexer no final.
4:) Layers, new raster layer
Selections, load selection, from disk.
Carregue a seleção "claire_yaris_fleur1"
Preencha com a cor 246260 (Foreground).
Selections, select none.
Plugin "Unlimited Paper Texture - -Fibrous Paper, Coarse" (88/128).
Aplique a sombra (0/0/60/10 / # 000000).
5:) Layers, new raster layer
Selections, load selection, from disk.
Carregue a seleção "claire_yaris_fleur2"
Preencha com a cor "d1330a" (Background).
Selections, select none.
Plugin "Unlimited Paper Texture - -Fibrous Paper, Coarse" (88/128).
Aplique a sombra (0/0/60/10 / # 000000).
6:) Layers, new raster layer.
Selections, load selection, from disk.
Carregue a seleção "claire_yaris_fleur3"
Preencha com a cor "d1330a" (background).
Selections, select none.
Plugin "Unlimited Paper Texture - -Fibrous Paper, Coarse" (88/128).
Aplique a sombra (0/0/60/10 / # 000000).
7:) Layers, new raster layer.Selections, load selection, from disk.
Carregue a seleção "claire_yaris_deco1"
Preencha com a cor 246260 (foreground).
Selections, select none.
Aplique a sombra (0/0/60/10 / # 000000).8:) Layers, new layer.
Selections, load Selections, from disk.
Carregue a seleção "claire_yaris_deco2"
Preencha com a cor a92fb3 (foreground).
Selections , select none
Aplique a sombra (0/0/60/10 / # 000000).
9:) Abra o tube de sua escolha.
Se necessário, redimensione a imagem.
Copie e cole como nova layer.
Posicione.
Aplique a sombra (0/0/60/10 / # 000000).
Aplique a sombra (0/0/20/100 / # d1330a)
Volte a posicionar os enfeites no seu tube.
10:) Adicione borda simétrica (1), cor "d1330a".Adicione bordas simétricas (4), "d1330a".
Assine seu trabalho.
Merge all.
Salve em JPG otimizado.
©Tutorial Traduzido por Estela Fonseca 01/05/2009.
Obrigada Claire por me permitir traduzir seu trabalho.