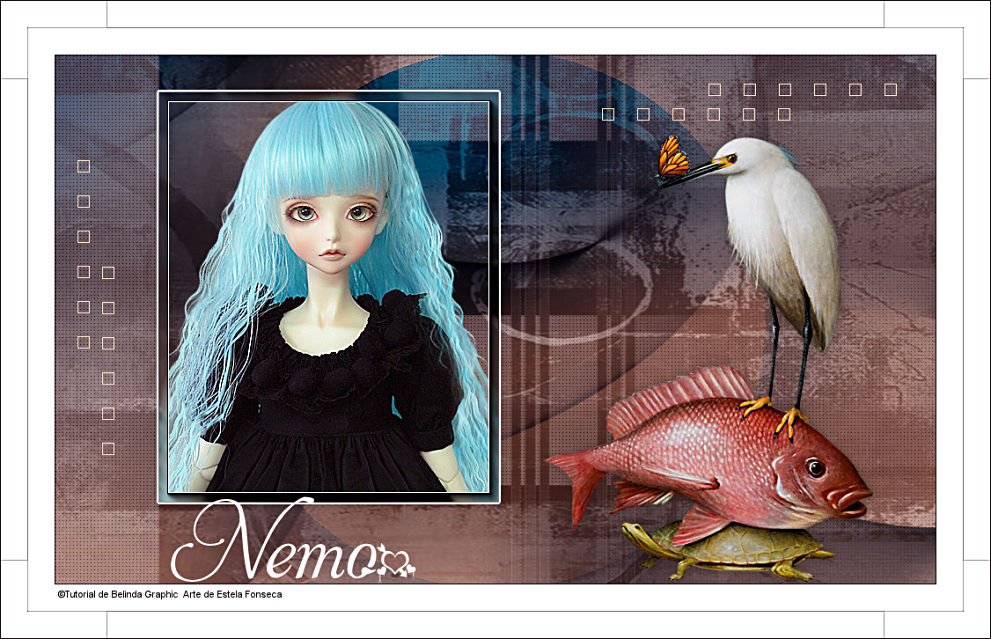
NEMO
Tutorial de ©Belinda - Original Aqui
Traduzido no PSP 2022 ultimate, mas pode ser realizado nas versões anteriores!
Materiais Necessários:
Tube de Jen-Cat-701-19-11-2012
JHanna_144_280309_MarkRyden-1
WA-Nemo©BelindaGraphic
LF-Mask-186
cas-Mask_0518_06
0_1c928f_89cdb979_orig
Layer-Alpha-Nemo (esta layer contém seleções em canal alfa)
Deco-Nemo
Palette-Nemo
Plugins:Filters Unlimited 2.0: Colors Filter / Blue Sky e Tile & Mirror
AAA Frames - Foto Frame
AP01 - Lines Silverlining
Itali@n Editors Efffect - Effeto Fantasma
CORES:
Primeiro Plano cor #917f75Plano de Fundo cor #f8d7c0
Cor Nº 3 #0c4865
***
1. Abra uma nova imagem transparente de 1000 / 650 pixels ou Abra a Layer Alpha e duplique.Preencha com a cor do Primeiro Plano.
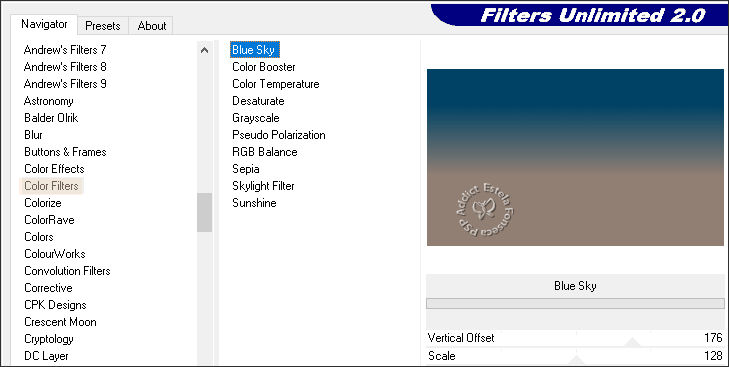
Effects / Plugins / Filters Unlimited 2.0 / Color Filter / Blue Sky.
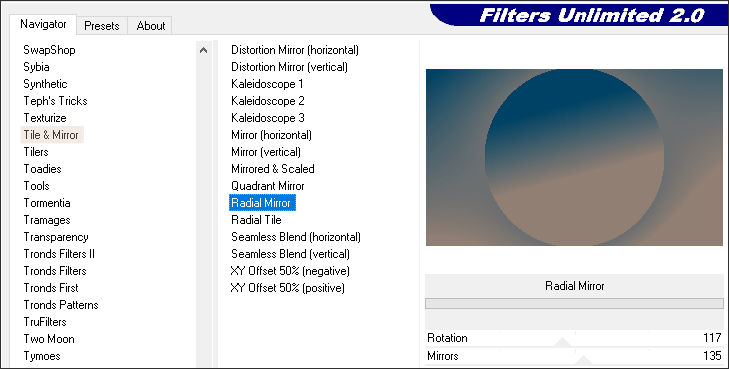
2. Effects Plugins / Filters Unlimited 2.0 / Tile & Mirror / Radial Mirror.
Adjust / Sharpness / Sharpen
3. Layers / New Raster Layer.
Selections / Select All.
Abra a «mask LF-Mask-186» Copie e Cole na seleção.Selections / Select None
Blend Mode / Soft Light
Opacidade / 87%.
4. Layers / New Raster Layer
Preencha com a cor Nº3 #0c4865
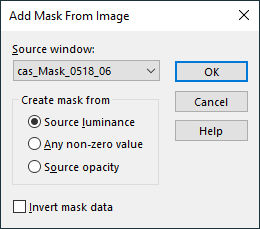
Ative a mask «cas_Mask_0518_06».
Layers / New Mask Layer / From Image:
Layers / Merge / Merge Group.
Blend Mode / Multiply
Layers / Duplicate
5. Layers / New Raster LayerPreencha com a cor #ffffff
Abra a Mask «0_1c928f_89cdb979_orig».
Layers / New Mask Layer / From Image:
Layers / Merge / Merge GroupOpacidade / 32%.
6. Effects / Plugins / AP01 Innovations / Lines-Silverlining.
Layers / Merge / Merge Visible
7. Selections / Load/Save selection / Load selection from alpha channel: Selection #1Selections / Promote selection to layer
Ative o tube «JHanna_144_280309_Mark Ryden-1»
Image / Mirror / Mirror Horizontal.
Copie!Cole como nova layer.
Posicione no centro da seleção.
8. Selections / InvertDelete no teclado
Selections / Invert
Mantenha a seleção
Layers / Merge / Merge Down
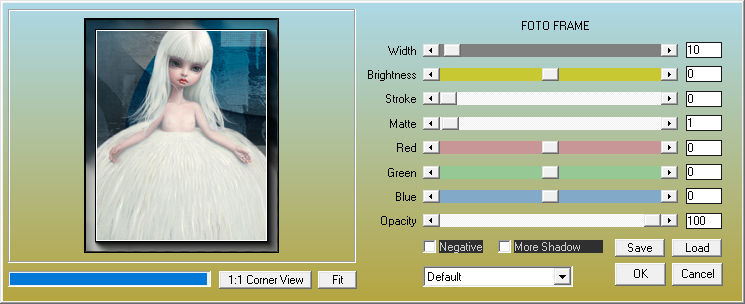
Effects / Plugins / AAA Frames / Foto Frame.
9. Selections / Modify / Selections Select borders
Preencha com a cor #ffffff
Selections / Select NoneEffects / 3D Effects / Drop Shadow: 1 / 1 / 30 / 15 / Cor #000000
10. Ative o arquivo «Déco Némo» Copie e Cole como nova layer
Pick Tool (K) Position X ( 25,00) Position Y: (119,00) Tecla "M" para desativar a Pick.
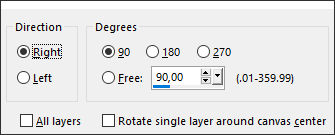
11. Layers / DuplicateImage / Free Rotate / 90° :
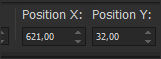
Pick Tool (K) Position X ( 621,00) Position Y: (32,00) Tecla "M" para desativar a Pick.
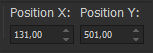
12. Abra o tube «WA Nemo». Copie e cole como nova layerPick Tool (K) Position X ( 131,00) Position Y: (501,00) Tecla "M" para desativar a Pick.
13. Abra o tube « Jen _Cat- 701_19-11-2012.» Copie e Cole como nova layer.Pick Tool (K) Position X ( 510,00) Position Y: (156,00) Tecla "M" para desativar a Pick.
14. Image / Add Borders / Symmetric Marcado / 1 pixel cor #0c4865
Image / Add Borders / Symmetric Marcado / 30 pixels cor #ffffff
Image / Add Borders / Symmetric Marcado / 1 pixel cor #0c4865
Image / Add Borders / Symmetric Marcado / 30 pixels cor #ffffff
15. Ative a "Varinha Mágica" (feather e Tolerance em 0) e selecione esta borda.
Selections / Promote selection to Layer
Effects /Plugins / Italian Editors Effect / Effetto Fantasma / Default.
16. Effects / Edge Effects / EnhanceSelections / Select None
17. Adicione o seu mome ou a sua marca d'água.Layers / Merge / Merge All (Flatten)
Image / Resize / 950 pixels de largura ... Resize All Layers ...Marcado
Salve como JPG.
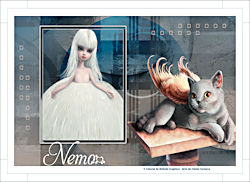
Versão 2: Tube de JHanna (Personagem) e de Nicole (Peixe/ave)
VOLTAR
©Tutorial Traduzido por Estela Fonseca 12/04/2024.
Obrigada Belinda por me permitir traduzir seu trabalho.