TESSA
Tutorial de ©Alenza, original, AQUI.
Tutorial traduzido no PSP X8, mas pode ser feito com outras versões.
Material Necessário:
Tubes de Isa
Plugins Utilizados:
Filter Factory Gallery J-Whirl BlurAAA Frames-Foto Frame
Toadies -Ommadawn, Metalwork, What Are You ?
Buttons & Frames- 3D Glass Frame 1
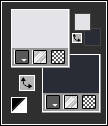
1) Abra uma Nova imagem transparente de 900/550 pixels2) Primeiro Plano cor #e4e3e8 / Segundo Plano cor #5e6f83
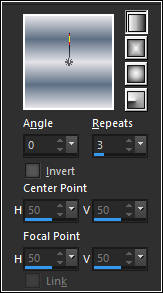
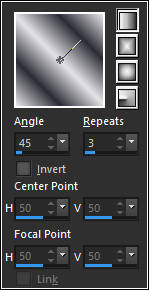
3) Prepare um Gradiente estilo <<Linear>>
Preencha a Layer com o Gradiente
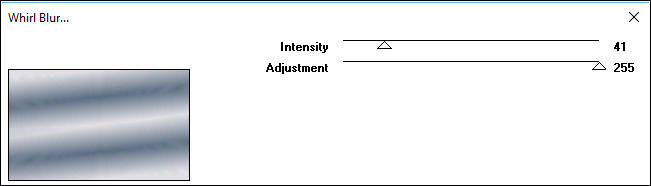
4) Effects / Plugin / Filter Factory Gallery J / Whirl Blur.
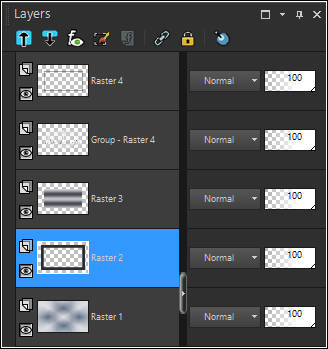
5) Layers / Duplicate
Image / Mirror / Mirror Horizontal (Image-Mirror)
Opacidade / 50 %
Layers / Merge / Merge Down
6) Layers / New Raster Layer
Selections / Select All
Selections / Modify / Contract 50 pixels
Segundo Plano cor #2a2d34
Preencha com a cor do Segundo Plano
Selections / Modify / Contract 50 pixels
Edit / Cut (Ou delete no teclado)
Mantenha a Seleção!
7) Layers / New Raster Layer
Primeiro Plano cor #e4e3e8/ Segundo Plano cor #2a2d34
Forme um Gradiente estilo <<Linear>>
Preencha a layer com o Gradiente
8) Adjust / Blur / Gaussian Blur / Radius 20
Mantenha a Seleção!
9) Abra a Mask <<alenza_masque41>> Minimize
Layers / New Raster Layer
Preencha com a cor do Primeiro Plano
Layers / New Mask Layer / From Image:
10) Layers / Merge / Merge Group
Effects / Edge Effects / Enhance
Mantenha a Seleção!
11) Layers / New Raster LayerPrimeiro Plano cor #d5a49d
Preencha a Layer com a cor do Primeiro Plano
Selections / Modify / Contract 4 pixels
Edit / Cut (ou delete no teclado)
Selections / Invert
Effects / 3D Effects / Drop Shadow: 2, 2, 50, 20, 00, #000000
Effects / 3D Effects / Drop Shadow: - 2, - 2, 50, 20,00, #000000
Selections / Select None
12) Ative a Layer <<Raster 2>>
Varinha Mágica:
Selecione a borda escura com a varinha mágica
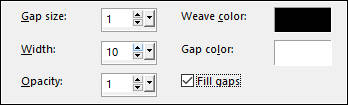
Effects / Texture Effects / Weaver
13) Effects / Plugin / AAA Frames / Foto Frame.
14) Effects / Plugin / Alien Skin Eye Candy 5 / Impact / Glass.
15) Blend Mode / Hard Light
Selections / Select None
16) Ative a Layer <<Raster 1>>
Layers / New Raster Layer
Preencha com a cor do Primeiro Plano
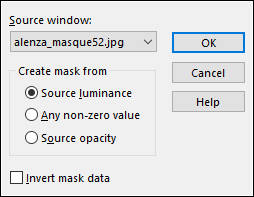
Abra a Mask <<alenza_masque52>> Minimize
Layers / New Mask Layer / From Image:
17) Layers / Merge / Merge Group
Effects / Edge Effects / Enhance
Effects / Edge Effects / Enhance More
18) Ative a Layer do topo
Layers / New Raster Layer
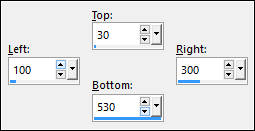
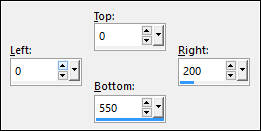
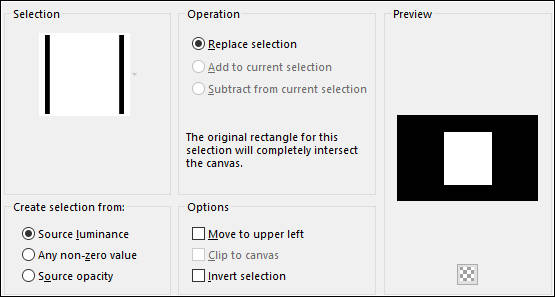
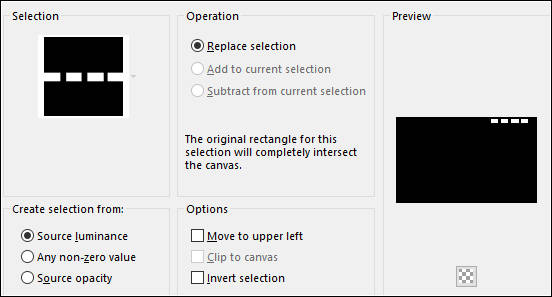
Selection Tool / Rectangle / Custom Selection:
19) Primeiro Plano cor #5e6f83
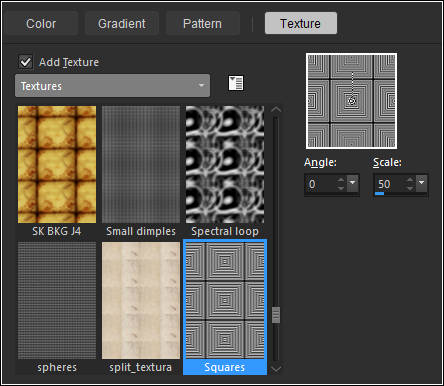
Na Paleta de Estilos e Texturas escolha marque a opção <<Texture>>
20) Textura Squares (Corel 15_0_12).
Preencha a seleção com a Textura
Selections / Select None
Blend Mode / Overlay
Layers / Duplicate
Image / Mirror / Mirror Horizontal (Image-Mirror)
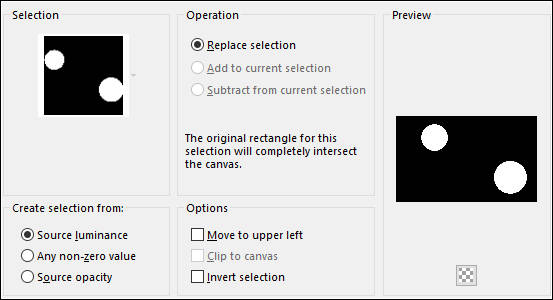
21) Layers / New Raster Layer
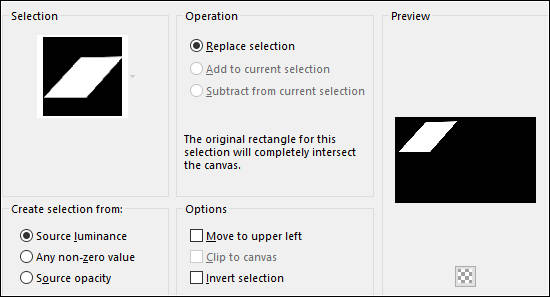
Selections / Load save selection / Load selection from disk: alenza_select411.
Preencha a seleção com a cor do Primeiro Plano
(desmarque a opção textura)
Blend Mode / Overlay
Selections / Select None
22) Layers / New Raster Layer
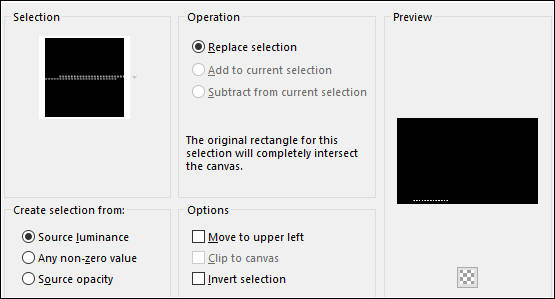
Selection Tool / Rectangle / Custom Selection
23) Forme um Gradiente estilo <<Linear>> com a cor #e4e3e8 no Primeiro Plano e #2a2d34 no Segundo Plano
Preencha a seleção com o Gradiente
24) Blend Mode / Overlay
Selections / Select None
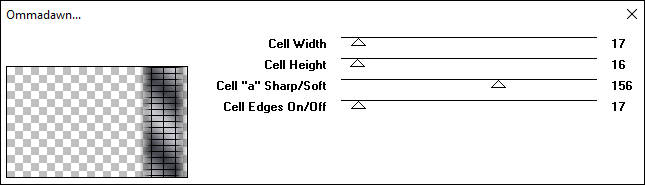
Effects / Plugin / Toadies / Ommadawn.
25) Layers / New Raster Layer
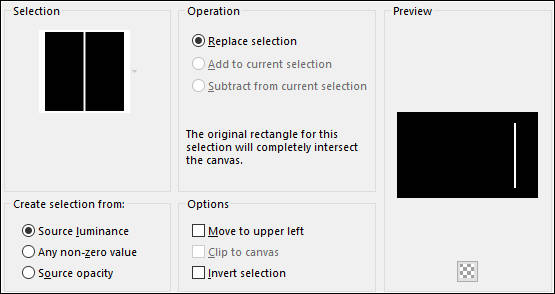
Selection Tool / Rectangle / Custom Selection
26) Preencha com o mesmo GradienteSelections / Select None
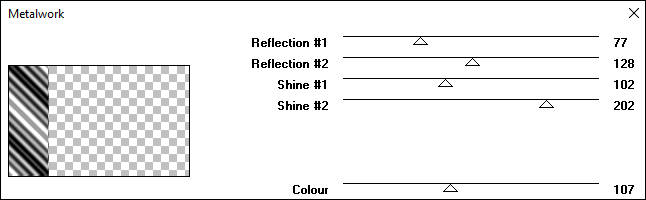
Effects / Plugin / Toadies / Metalwork.
27) Effects / Plugin / Toadies / What Are You ? 20, 20.
Blend Mode / Soft Light
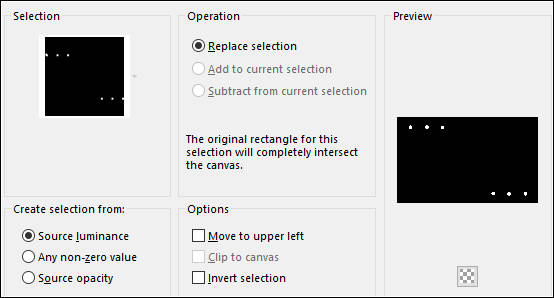
28) Layers / New Raster Layer
Selections / Load save selection / Load selection from disk: alenza_select412
Segundo Plano cor #5e6f83
Preencha com o Gradiente
29) Selections / Select None
Blend Mode / Color (ou Soft Light).
30) Layers / New Raster LayerSelections / Load save selection / Load selection from disk: alenza_select413
Mude a cor do Segundo Plano para #d5a49d
Preencha a Seleção com o Gradiente
Selections / Select None
Blend Mode / Color (Legacy) (ou Multiply).
31) Layers / New Raster LayerSelections / Load save selection / Load selection from disk: alenza_select414
Mude a cor do Segundo Plano #5e6f83
Preencha a seleção com o Gradiente
Selections / Select None
Effects / Plugin / Alien Skin Eye Candy 5 / Impact / Glass ( mesmas configurações de antes)
32) Effects / 3D Effects / Drop Shadow: 2 / 2 / 50 / 10,00 / #000000
33) Layers / New Raster Layer
Selections / Load save selection / Load selection from disk: alenza_select415
PrimeiroPlano cor #2a2d34
Preencha a seleção com a cor do Primeiro Plano
Selections / Modify / Contract / 1
Edit / Cut ( ou delete no teclado)
Selections / Modify / Contract 10 pixels
Preencha com a cor do Primeiro Plano
Selections / Select None
34) Layers / New Raster Layer
Selections / Load save selection / Load selection from disk: alenza_select416
Preencha com a cor do Primeiro Plano
Selections / Select None
Effects / 3D Effects / Drop Shadow: 2 / 2 / 50 / 10,00 / #000000
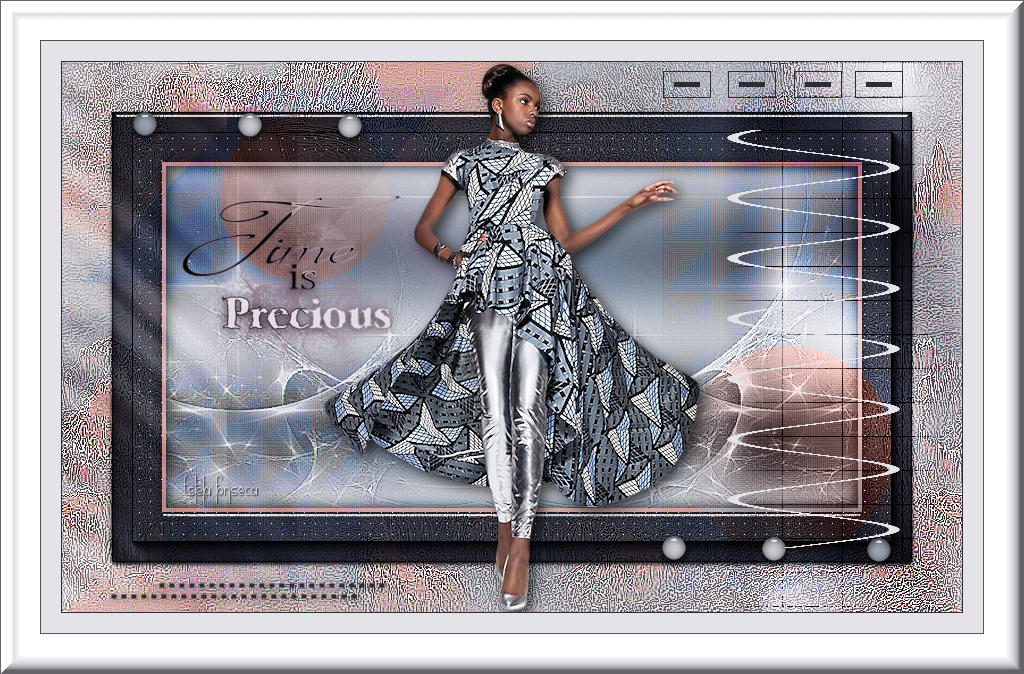
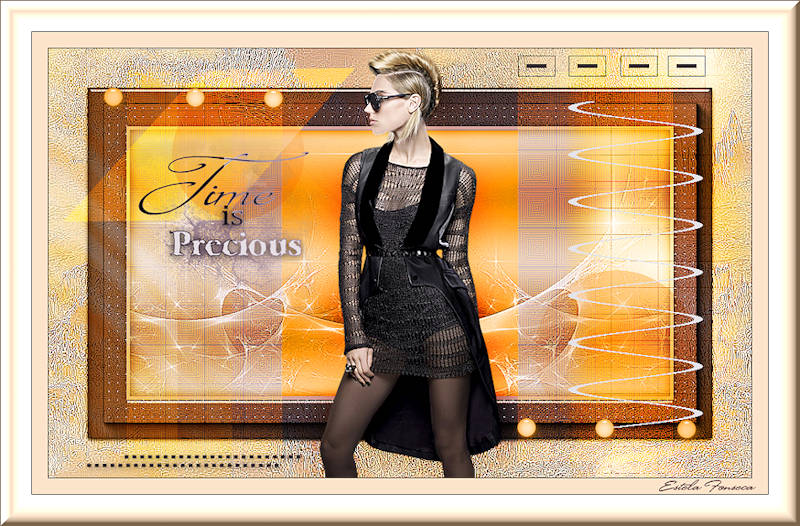
35) Abra o tube <<WO0004>>Image / Resize / 50 % (Resize all layers marcado)
Copie e Cole como nova layer (não se esqueça de remover a assinatura)
Posicione à esquerda
Você pode mudar a cor com Adjust / Hue and Saturation / Colorize
36) Layers / New Raster Layer
Selections / Load save selection / Load selection from disk: alenza_select417
Preencha a seleção com a cor #e4e3e8
Selections / Select None
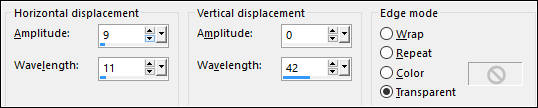
Effects / Distortion Effects / Wave:
37) Blend Mode / Soft Light
38) Abra o tube <<femmesentieres0068>>Image / Resize / 85 % ( All layers marcadas)
Copie e Cole como nova layer
Effects / 3D Effects / Drop Shadow: 5 / 5 / 70 / 20,00 / #000000
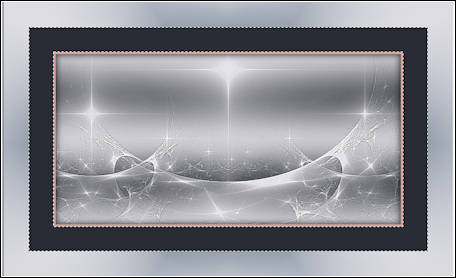
39) Image / Add Borders / Symmetric Marcado / 1 pixel cor #2a2d34
Image / Add Borders / Symmetric Marcado / 20 pixels cor #e4e3e8
Image / Add Borders / Symmetric Marcado / 1 pixel cor #2a2d34
Image / Add Borders / Symmetric Marcado / 40 pixels cor #e4e3e8
40) Ative a Varinha Mágica e selecione a borda de 40 pixels
Effects / I.C.NET Software / Unlimited 2.0 / Buttons & Frames /3D Glass Frame 1.
Selections / Select None
41) Coloque a sua assinatura
Redimensione se desejar
Salve como jpeg.
Versão com tube de Joanie:
©Tutorial Traduzido por Estela Fonseca 09/11/2016.
Obrigada Alenza por me permitir traduzir seu trabalho.