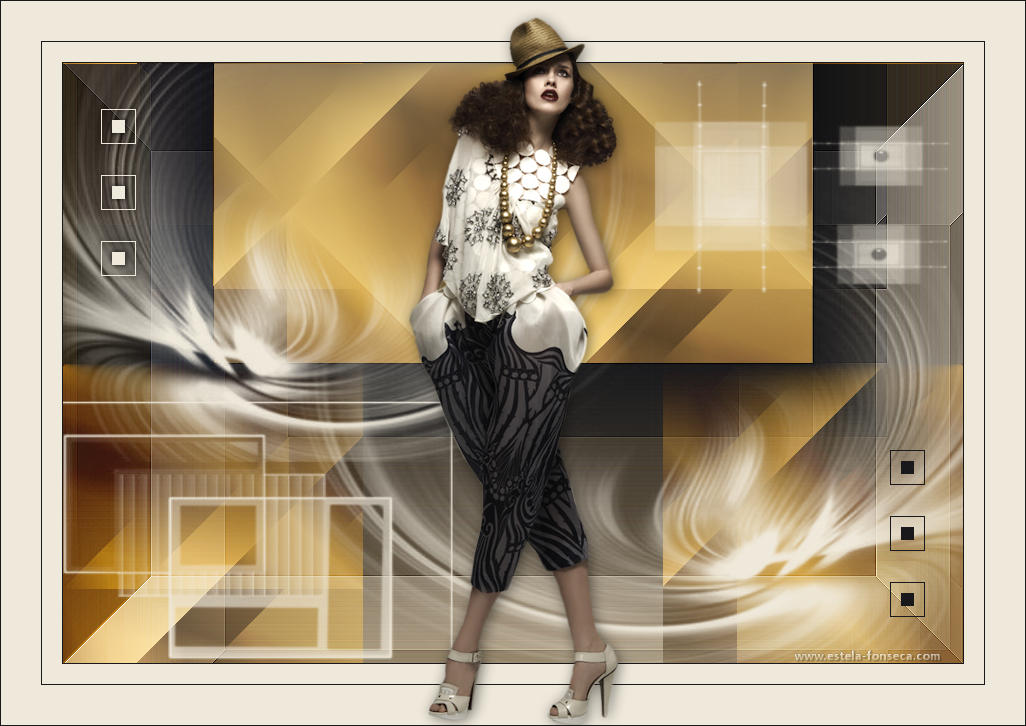
SOLINE
Tutorial de ©Alenza, original, AQUI.
Tutorial traduzido no PSP X8, mas pode ser feito com outras versões.
Material Necessário:
Tube de Ana Ridzi
Mask Papillon de Avril
Plugins Utilizados:
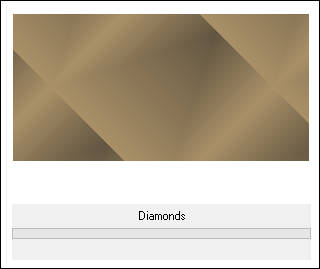
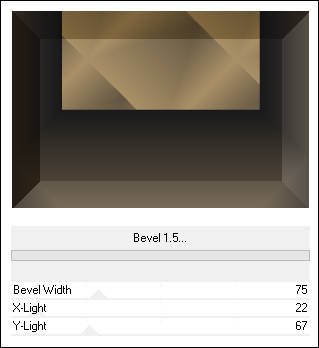
Simple / Half Wrap / Diamonds / BlintzFilters Factory Gallery G / Bevel 1.5
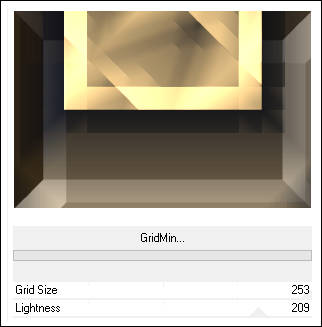
Filters Factory Gallery H / GridMin
01- Abra o arquivo <<alenza_alpha_soline>> Duplique e feche o original, trabalhe na cópia.
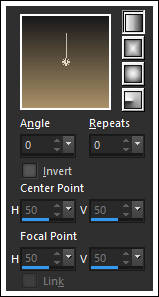
02- Coloque no Primeiro Plano a cor #a99067 e no Segundo Plano a cor #19191b03- Forme um Gradiente estilo <<Linear>> como segue:
Preencha a layer com o Gradiente
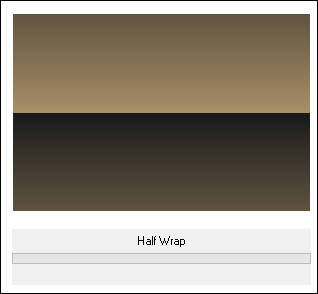
04- Effects / Plugin / Simple / Half Wrap:
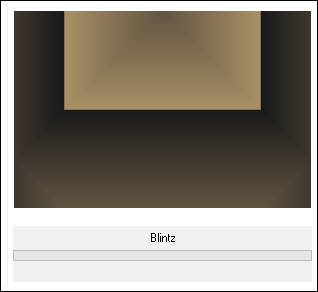
Effects / Plugin / Simple / Blintz:
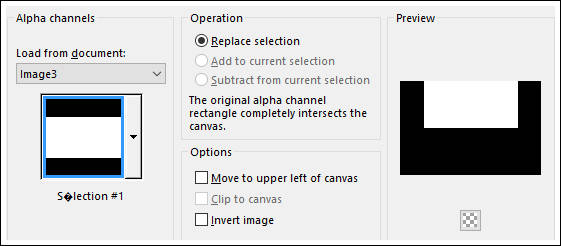
05- Selections / Load save selection / Load selection from alpha channel: sélection 1
Effects / Plugin / Simple / Diamonds:
06- Selections / Promote selection to layerSelections / Select None
Image / Mirror
Blend Mode / Luminance (Lagacy)
Nota: Ou outro dependendo de suas cores.
07- Ative a layer <<Raster 1>>
Selections / Load save selection / Load selection from alpha channel: Selection#1
Selections / Invert
08- Effects / Plugin / Filter Factory Gallery G / Bevel 1.5
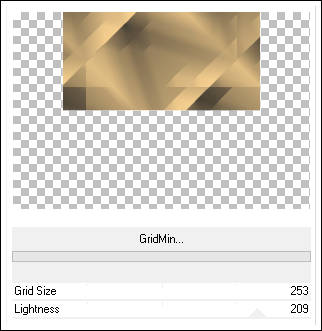
09- Effects / Plugin / Filter Factory Gallery H/GridMin
10- Effects / Edge Effects / Enhance
Selections / Select None
11- Ative a Layer do topo
Effects / Plugin / Filter Factory Gallery H / Gridmin:
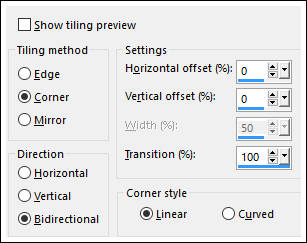
12- Effects / Image Effects / Seamless Tiling:
13- Blend Mode / Hard Light
14- Desfaça o Gradiente e coloque no Primeiro Plano a cor #efe9db
Layers / New Raster Layer
Preencha com a cor do Primeiro Plano
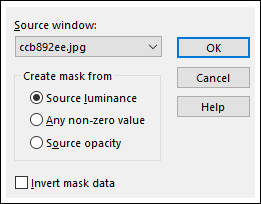
Abra a Mask <<ccb892ee>> Minimize no PSP
Layers / New Mask layer / From Image:
15- Layers / Merge / Merge Group
16- Layers / New Raster Layer
Selections / Load save selection / Load selection from Alpha Channel: Selection #2
Preencha com a cor do Primeiro Plano
Selections / Modify / Contract 1 pixel
Edit / Cut ou delete no teclado
Selections / Modify / Contract 10 pixels
Preencha com a cor do Primeiro Plano
Selections / Select None
Effects / 3D Effects / Drop Shadow: 0 / 0 / 100 / 10,00/ #000000
17- Layers / New Raster Layer
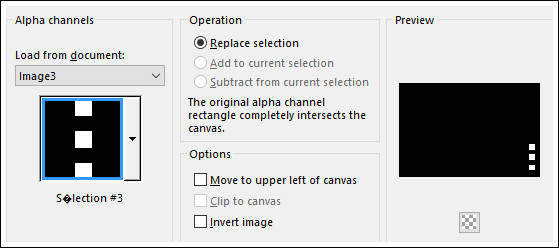
Selections / Load save selection / Load selection from Alpha Channel: Selection #3
Preencha com a cor do Segundo Plano
Selections / Modify / Contract 1 pixel
Edit / Cut ou delete no teclado
Selections / Modify / Contract / 10 pixels
Preencha com a cor do Segundo Plano
Selections / Select None
18- Image / Add Borders / Symmetric Marcado / 1 pixel cor do Segundo Plano
Image / Add Borders / Symmetric Marcado / 20 pixels cor do Primeiro Plano
Image / Add Borders / Symmetric Marcado / 1 pixel cor do Segundo Plano
Image / Add Borders / Symmetric Marcado / 40 pixels cor do Primeiro Plano
19- Abra o tube << AR579 >> Copie e Cole como nova layer
Image / Resize / 85 % (Resize all layers desmarcado)
Posicione
Effects / 3D Effects / Drop Shadow: 2 / 2 / 50 / 20,00 / #000000
20- Image / Add Borders / Symmetric Marcado / 1 pixel cor do Segundo Plano
Coloque seu nome.
Redimensione se desejar
Salve como jpeg.
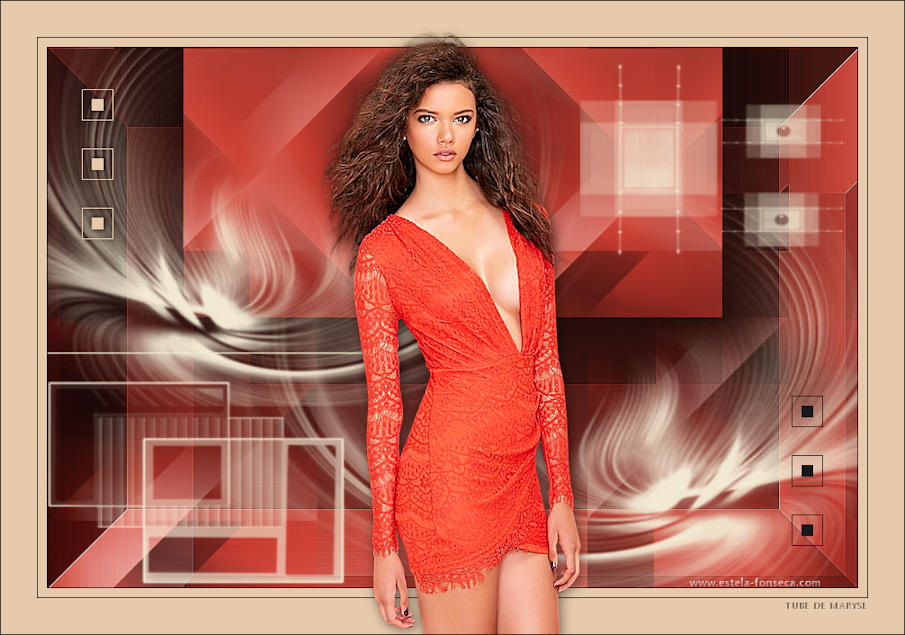
Versão com tube de Maryse:
©Tutorial Traduzido por Estela Fonseca 26/08/2016.
Obrigada Alenza por me permitir traduzir seu trabalho.