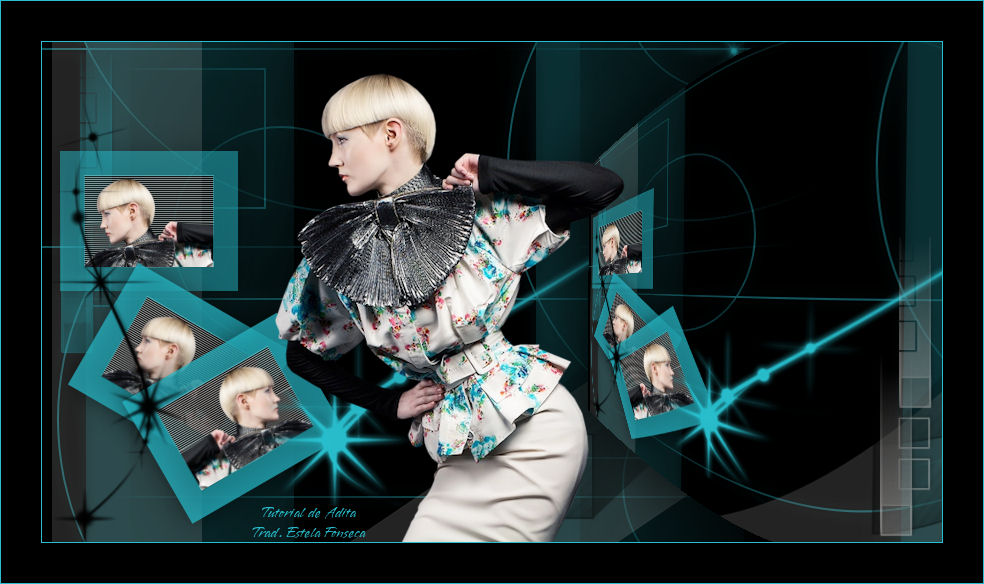
FASHION
Este tutorial é uma tradução de uma criação original de Adita , original, Aqui .
A criação desta tradução foi feita com o PSPX3 . Este tutorial é de nível avançado.
Material Necessário:
Betsie_323_8jan.2010
Mascara aditascreations_mask_fashion_02
Eye Candy Imapact presets
aditascreations_perspectiveshadow_fashion_01
aditascreations_perspectiveshadow_fashion_02
aditascreations_perspectiveshadow_fashion_03
Importar presets al Eye Candy 5:Impact
aditascreations_brush_fashion_01
aditascreations_brush_fashion_02
aditascreations_brush_fashion_03
aditascreations_brush_fashion_04
Coloque os brushes na pasta de Brushes do Psp.
Plugins Utilizados:
Simple-Quick Tile - Aqui
Richard Rosenman-Scanline - Aqui
Alien Skin Eye Candy5:Impact - Aqui
MV's Plugins-PanoWarp - Aqui
01- Abra uma imagem cor preta de 900 x 500 pixels.
Layers, New Raster Layer, preencha com a cor #28becd
02- Layers, Load/Save Mask, Load Mask From Disk, mask aditascreations_mask_fashion_02, Load
Layers, Merge, Merge Group, Layers, Merge, Merge Visible
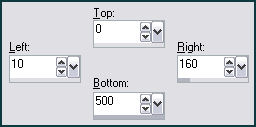
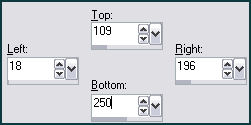
03- Layers, New Raster Layer, ative a ferramenta Selection Tool , clique em Custom selection como segue:
Configure com os valores:
04- Foreground cor #e6e2df ative a ferramenta Flood Fill Tool valores:
Preencha a seleção , Selections, Select None
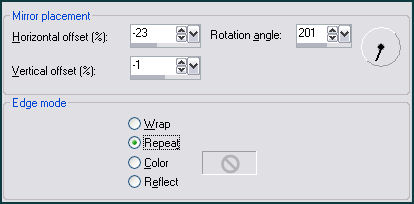
05- Effects, Reflection Effects, Rotating Mirror valores:
Opacidade 32% .
06- Layers, New Raster Layer
Ative a ferramenta Brush Tool . Brush aditascreations_brush_fashion_01, Cor #e6ed2f
Configurado como na imagem abaixo:
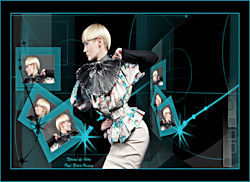
Carimbe no canto superior esquerdo, veja o modelo final no topo desta página
07- Effects, 3D Effects, Drop Shadow: -1/2/27/3,00/#000000
Layers, New Raster Layer
Foreground cor #000000
brush aditascreations_brush_fashion_02 , coloque como na imagem:
08- Layers, New Raster Layer, ative a ferramenta Selection Tool, Custom selection valores:
Preencha a seleção com a cor do foreground #28becd . Flood Fill valores anteriores
Selections, Modify, Contract, 25 pixels, tecla delete, Selections, Modify, expand, 1 pixels
09- Layers, New Raster Layer preencha com a cor #e6e2df
Effects, Richard Rosenman, Scanline, default, Effects, Plugins, Simple, Quick Tile
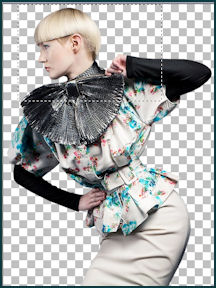
10- Ative o tube Betsie_323_8jan.2010,duplicar e feche a original. Use a copia.
Ative a ferramienta Selection Tool selecione o tube como mostra a imagem:
11- Copie e cole na seleção, Selections, Select None
Layers, Arrange, Move Down ative a layer Raster 4 ( a layer de cima)
Layers, Merge, Merge Down
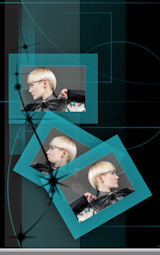
12- Effects, Plugins, Alien Skin Eye Candy5:Impact, Perspective Shadow, preset
aditascreations_perspectiveshadow_fashion_01, ok
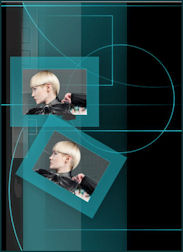
Layers, Duplicate, Image, Free Rotate valores: Right / Free/ 30
Posicione como na imagem:
13- Layers, Duplicate, Image, Mirror , posicione:
14- Layers, New Raster Layer Ative a ferramenta Brush Tool
Foreground cor #000000 (negro)
Brush aditascreations_brush_fashion_03 posicione como na imagem final
Effects, 3D Effects, Drop Shadow valores anteriores
15- Layers, New Raster Layer Brush o pincel aditascreations_brush_fashion_04
valores anteriores color Foreground #28becd acomodar como na imagem abaixo:
16- Effects, 3D Effects, Drop Shadow valores anteriores
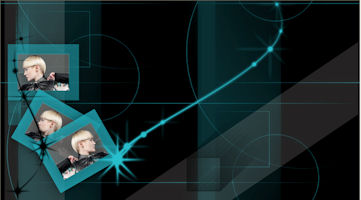
Layers, Merge, Merge Visible, Layers, duplicate
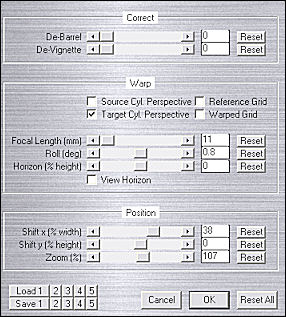
Effects, Plugins, Mv's Plugins, PanoWarp valores:
17- Effects, Plugins, Alien Skin Eye Candy 5:Impact, Perspective Shadow Preset
aditascreations_perspectiveshadow_fashion_02,
18- Ative a ferramenta Brush Tool Foreground color #e6e2df
Mude apenas a opacidade para 100
Coloque do lado direito da imagem, veja exemplo final no topo dessa página
19- Effects, 3D Effects, Drop Shadow valores anteriores
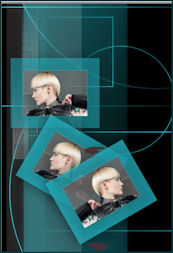
Ative o tube Betsie_323_8jan.2010, Image, Resize 85%
Copie e cole como nova layer, posicione como no exemplo.
20- Effects, Plugins, Alien Skin Eye Candy 5: Impact, Perspective Shadow Preset
aditascreations_pespectiveshadow_03, ok
Layers, Merge, Merge Visible
21- Image, Add Border 1 pixel cor #28becd
Image, Add Border 40 pixels cor #000000 (negro)
Image, Add Border 1 pixel cor #28becd
22- Layers, New Raster Layer , coloque a sua marca d'água e seu nome.
Salve em jpg optimizer.
©Tutorial traduzido por Estela Fonseca em 12/03/2010.
Não alterar nem repassar sem autorização.