 TOP ADITA
Programa Corel Paint Shop Pro
X3
Material Necessário:
k @ rine__dreams__Pretty_Face_844_DECEMBRE_2009 luzcristina.pspimage1-2093 (mulher)
Masks
Flaming Pear / Fexify 2 Kiwi's Oelfilter
*
* 01- Abra uma nova imagem transparente de 1024 x 600 pixels Foreground cor # 872c15 / Background cor # 2c0000 Forme um Gradiente Estilo Linear Angle 0 / Repeats 1 / Invert marcado Preencha a imagem com o gradiente
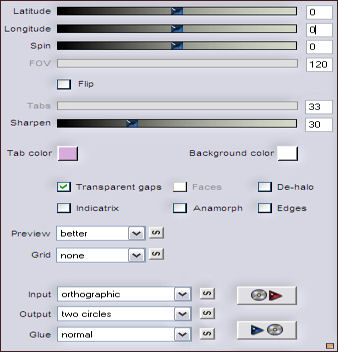
02- Effects / Plugins / Kiwi's Oelfilter / Zig Zack : 70/21/ 133/131
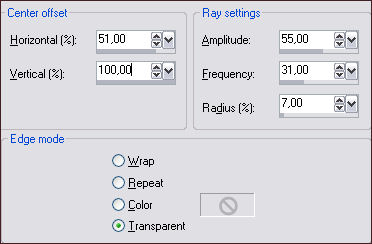
Effects / Distortion Effects / Polar Coordenates / Rectangular to polar / transparente.
03- Image /Resize / 90% / Resize All Layers ...Desmarcado. Adjust / Sharpness / Sharpen
04- Layers / Duplicate Selctions / Select All Selections / Float Layers / New Layer Raster
05- Abra o tube k @ rine__dreams__Pretty_Face_844_DECEMBRE_2009 Layers / Load / Save mask / Load mask from disk / Localizar a mask: 20-20 Layers / Merge / Merge Group Copie o tube e cole na seleção Selections / Select None Opacidade 24
Effects / 3D Effects / Drop Shadow: 0/-1/61/41,58/#000000
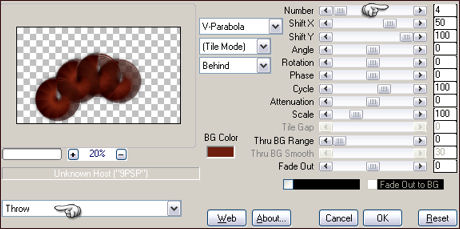
07- Effects / Plugins / Mura's Meister / Copies:
Effects / Image Effects / Offset : 0/40/Custom / Transparente
08- Ative a Layer do fundo (Raster 1) Effects / Image Effects / Offset: 0/20/custom /transparente
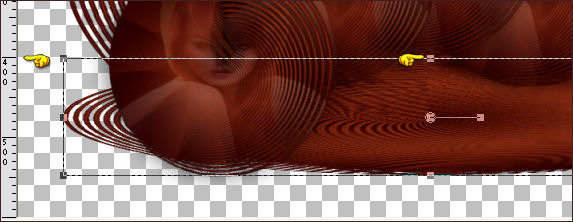
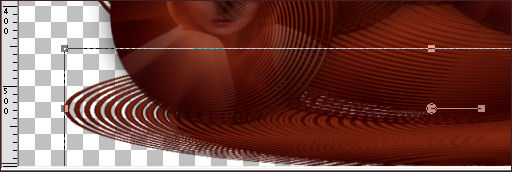
09- Layers / Duplicate Ative a Régua Usando a marca de central superior da ferramenta, mova a forma para 400 pixels de altura :
Layers / Arrange / Move Down Ative novamente a ferramenta Deformation Tool Mova novamente agora Usando o marcador central arraste até 450 pixels de altura
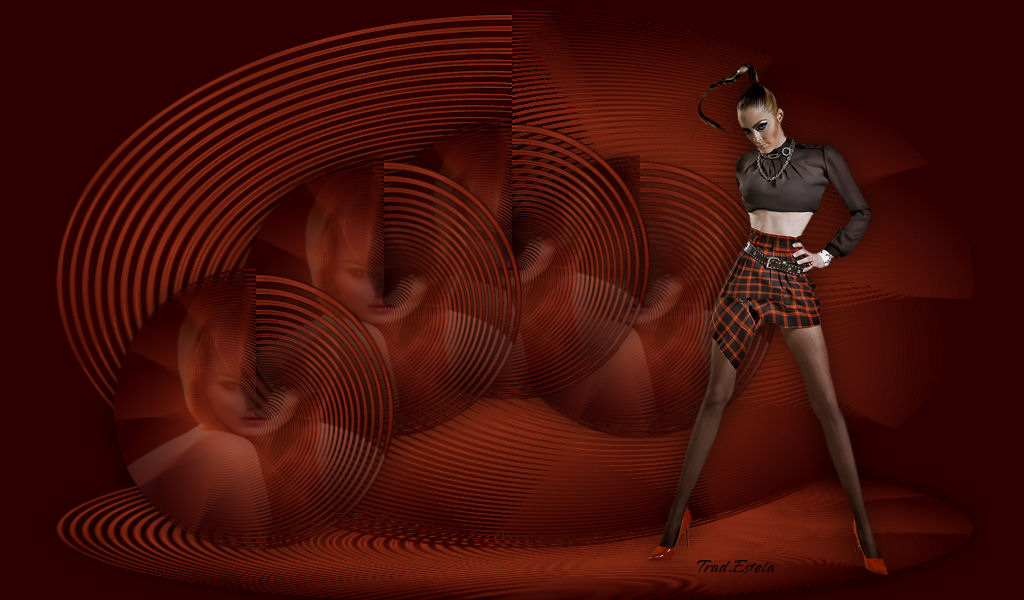
Layers / New Raster Layer Preencha com a cor # 2c0000 Layers / Arrange send to bottom Layers / Merge / Merge Visible Abra o tube luzcristina.pspimage1-2093 (mulher) Copie e cole como nova layer Image / Resize / 70% /Desmarque a opção Resize All Layers
Coloque a direita (Veja Resultado Final)
11 - Assine seu trabalho Salve como JPG.
©Tutorial traduzido por Estela Fonseca em 30 de
Abril de 2010. |